Documentation
Connecting a Client
Connect a client to this server with the pairing QR code from the Web UI — or by typing the details in by hand. Everything a client needs (address, port, secret key) is shown in the Server section.
Prepare the server
- Open the
Serversection and make sure aSecret Keyis set; click the dice button to generate one. Regenerating the key invalidates every paired client, which must pair again. - Expand the
QR Codeblock and choose theNetwork InterfaceandIP Version(IPv4 / IPv6) that other machines should use to reach this server. - If a DDNS domain is configured, you can switch
Connection Typeto theDDNS Domainso the QR code embeds the domain instead of an IP address. - The
Pairing Previewshows the exact Connection URL (wss://host:port) that the client will dial. - Clicking the
QR codecopies an encrypted share string to the clipboard — the clients use it for one-tap autofill.
Desktop client
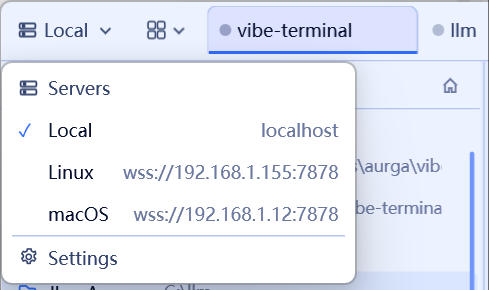
- Click the server-name button in the title bar and choose
Serversin the menu to open the Server Manager dialog.
- Click the
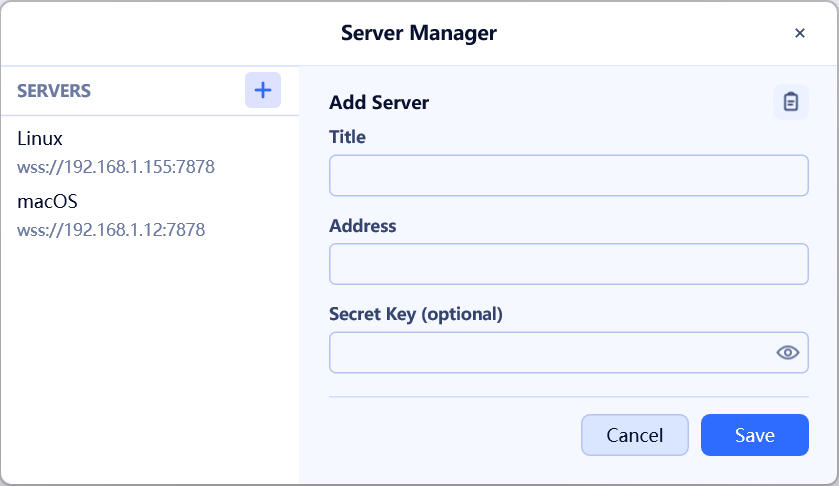
+button beside the server list to start the Add Server form. - If the share string is on your clipboard, a clipboard icon appears in the top-right of the form — click it to decrypt the string and auto-fill
Title,AddressandSecret Key. - Otherwise fill in the fields by hand: a display name, the connection URL (
wss://host:port, IPv6 addresses in brackets) and the secret key. - Click
Save, then pick the new server to open a session.