Documentation
Screenshots & Images
Screenshots and the terminal meet in one flow: press a single global hotkey to grab any region of the desktop, mark it up, and copy or save it — then paste the clipboard image straight into a terminal, where it lands as a file path the running program (a code agent included) can open and use. Both halves live in the desktop client.
Taking a screenshot
- Press
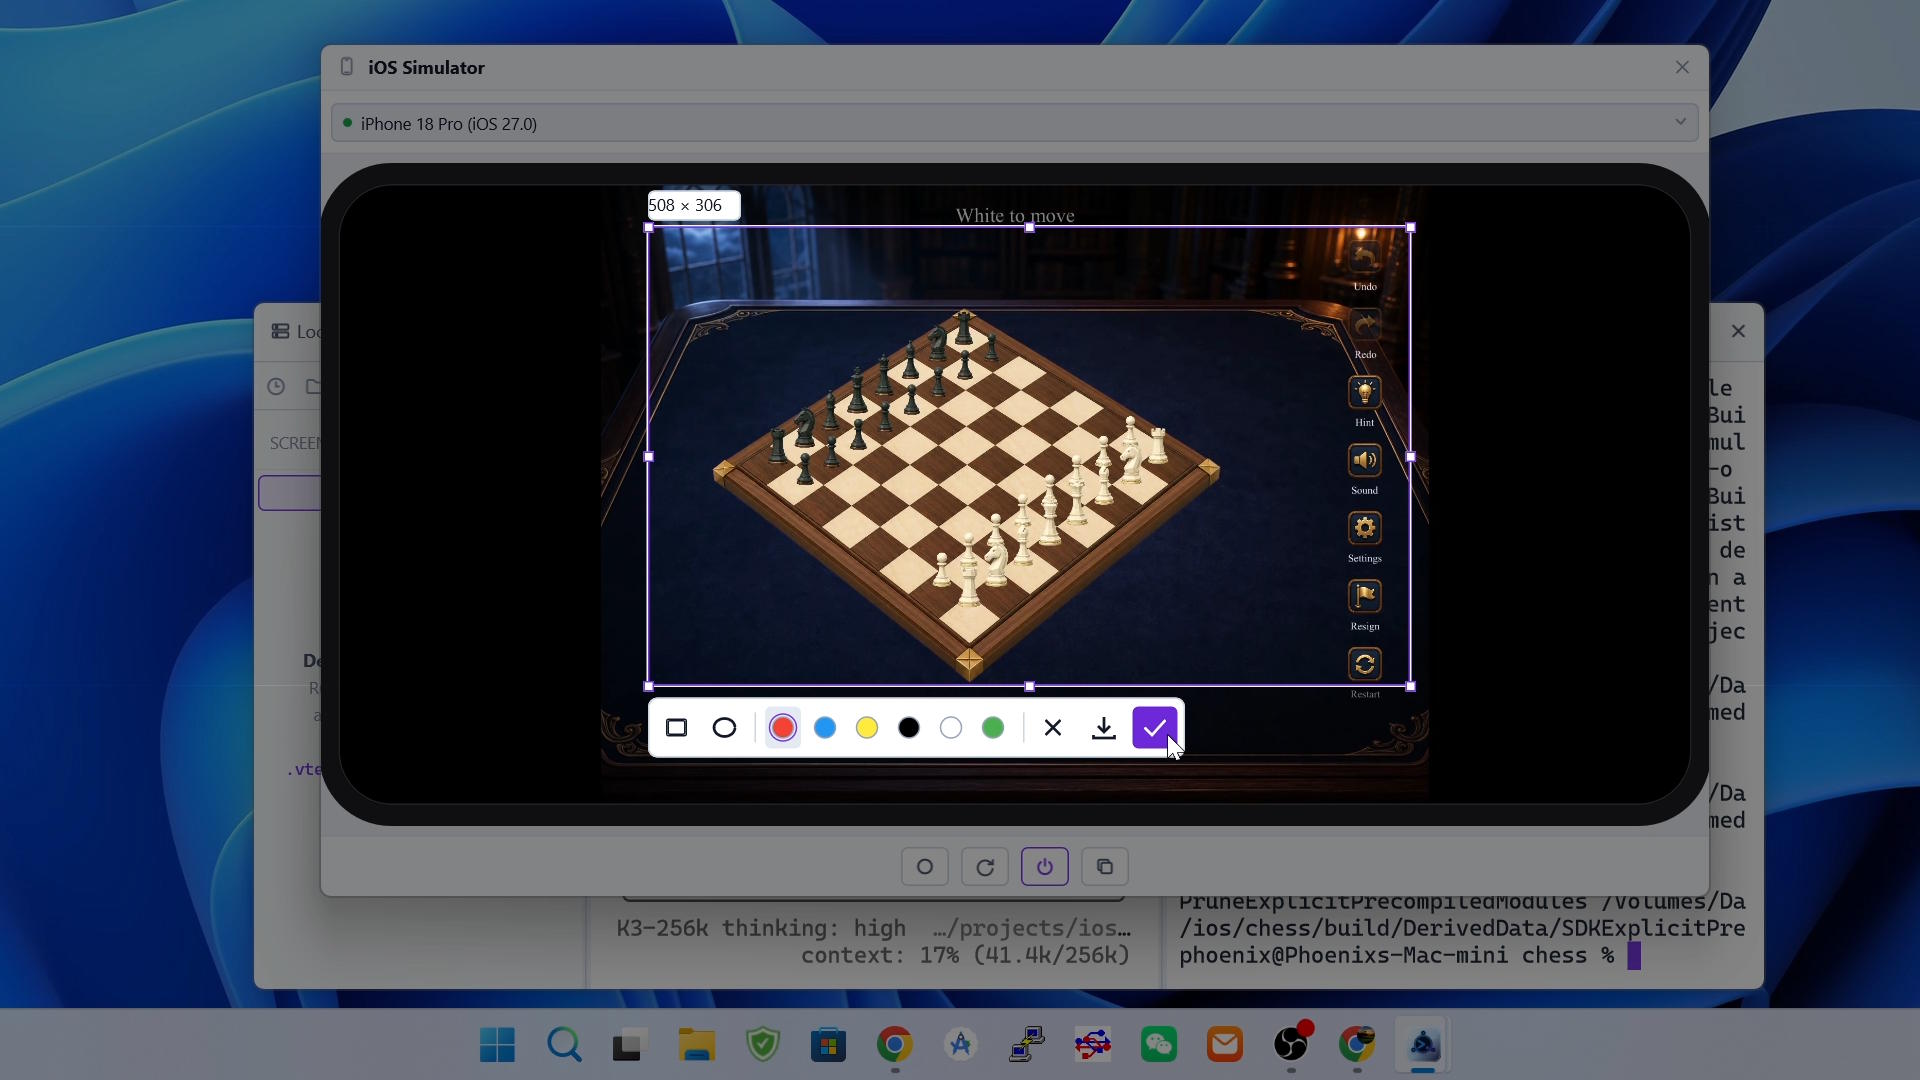
Shift+Alt+Aanywhere: the hotkey is global, so it fires no matter which app has focus while the desktop client is running (on macOS, pressShift+Command+A); - Every display dims under a capture overlay. Drag to draw the selection — it may span several displays — then drag inside it to move, or pull one of its handles to resize; a badge above the selection shows its size in pixels;
- Press
Escat any point to cancel.
Annotating
The toolbar that appears under the selection carries the annotation tools on the left (rectangle and ellipse), six colors in the middle, and three action buttons on the right — cancel (✕), save (download arrow) and copy (✓).
- Pick a tool and a color, then drag inside the selection to draw; strokes are clipped to the selection;
Ctrl+Zundoes the last annotation,Ctrl+Rredoes it;- Dragging a fresh area outside the current selection discards it — annotations included — and starts a new one.
Copy or save
Copy(✓) puts the annotated capture on the clipboard — ready to paste into a terminal (below), a chat, or any other app;Save(download arrow) writes a PNG through a save dialog; the file name defaults tovterm-screenshot-<timestamp>.png.
Pasting an image into a terminal
- Copy an image to the clipboard — from the screenshot tool above, a browser, or the operating system’s own capture;
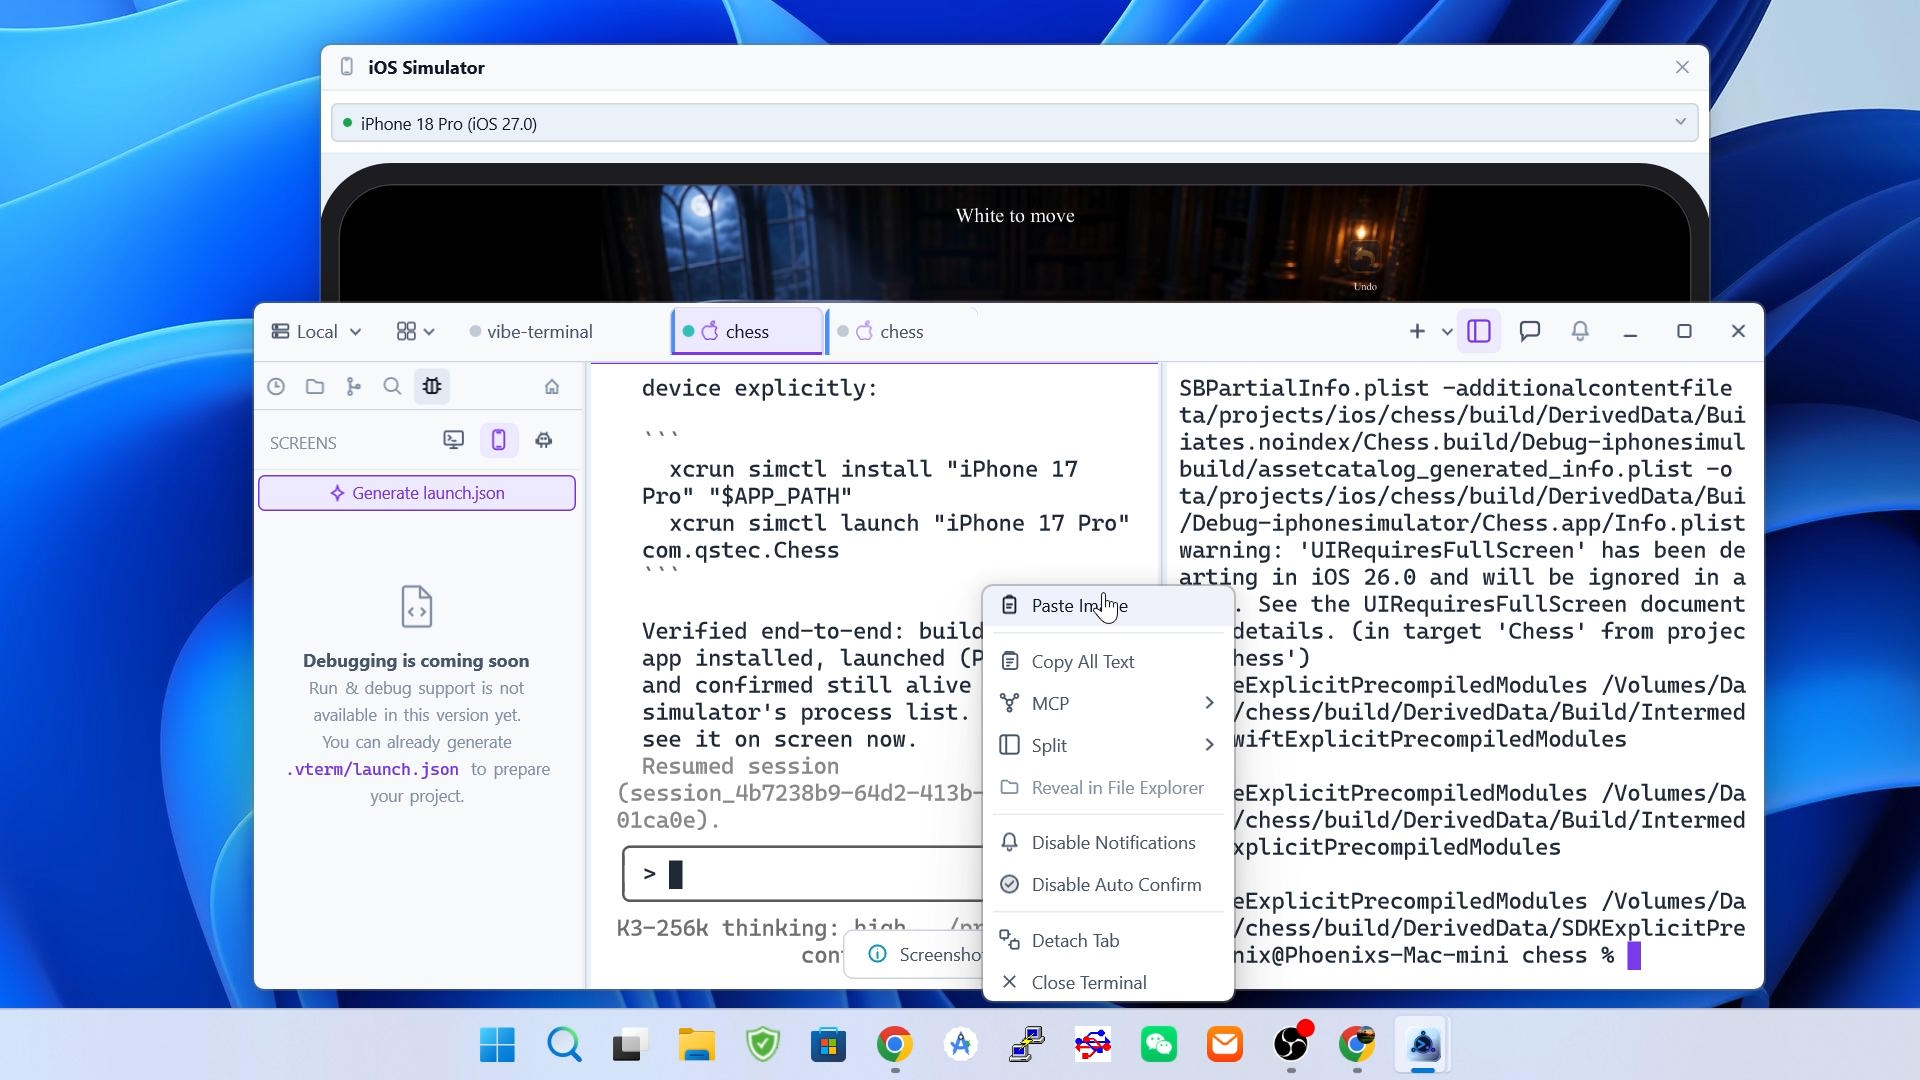
- Right-click the terminal and pick
Paste Image; the entry only appears when the clipboard actually holds an image; - The image is uploaded to the session’s server and stored there as a temporary file; its quoted path is then inserted at the terminal’s cursor exactly as if typed — wrapped in bracketed-paste markers when the running app supports them, so shells, editors and agents receive it cleanly;
- To the program it is plain text: a code agent such as Claude Code or opencode opens the image from the path, and ordinary shell commands can use it as an argument.
Notes
- The inserted path lives on the session’s server: for a remote or WSL server the temporary file is created on that machine, right where the programs running in the terminal can reach it;
- Combined with
Adding Context to Agents, this is the quickest way to show an agent something on your screen — capture, paste, and the agent holds the picture as a file; - On Linux the capture works under X11; native Wayland sessions support neither the global hotkey nor the interactive overlay, and if another X11 app already grabbed
Shift+Alt+A, the hotkey cannot register.