Documentation
Strict Verification on Clients
By default a client encrypts every connection but does not verify who is on the other end — the same trust-on-first-use posture as accepting a self-signed certificate in a browser. Strict verification changes that: the client checks the server’s certificate against a Root CA you provide and refuses to connect unless the chain, validity, and SANs all check out. This makes man-in-the-middle attacks on the connection effectively impossible, at the cost of one manual step: giving the client the server’s Root CA.
Where to set it up
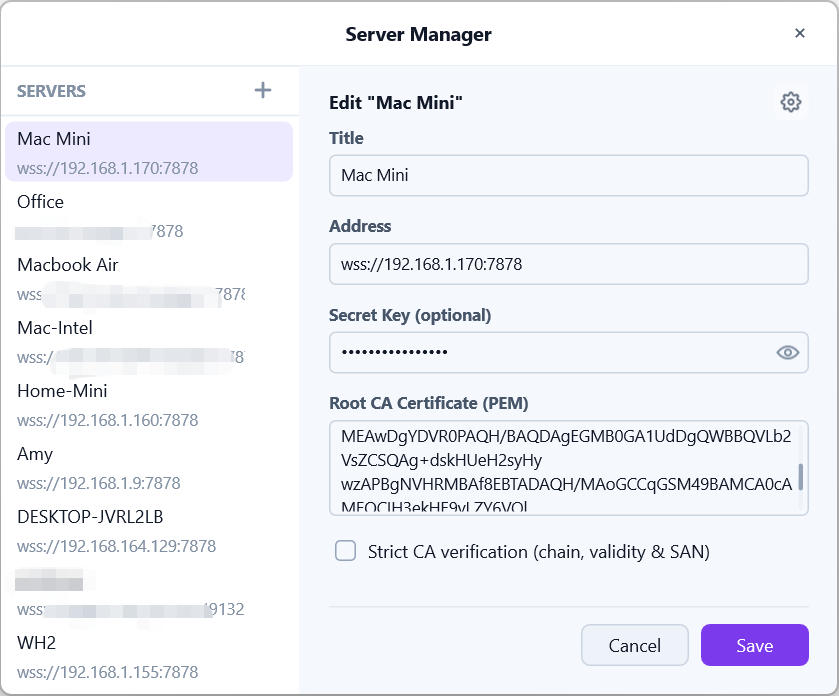
Strict verification is configured per server in the client’s server edit panel, alongside the address and secret key:
Root CA Certificate (PEM)— a multiline field for the server’s Root CA public certificate;Strict CA verification (chain, validity & SAN)— only selectable once a CA has been entered.
Getting the Root CA onto the client
Two ways, from the same source (the server’s Certificates & TLS page — see the Domains & SAN Management page):
- Copy & paste — press
Copy Root CAin the Web UI and paste the PEM into the client’sRoot CA Certificate (PEM)field; - Import a share string — share strings produced by the client embed the Root CA alongside the address and key. Importing such a share prefills the CA field automatically, so the recipient only has to tick the strict checkbox.
The CA is the same for every client and never changes across certificate renewals — set it once per server.
What strict mode checks
With the checkbox enabled, every connection to that server must present a certificate that:
- Chains to the configured Root CA — a certificate signed by anything else is rejected;
- Is within its validity window — expired or not-yet-valid certificates are rejected;
- Carries a SAN matching the address you are connecting to — a certificate issued for different names is rejected.
If any check fails, the connection is refused with an error explaining which check failed. Without the checkbox (or without a CA), connections stay encrypted but skip these checks.
Verify the fingerprint
Before trusting the CA, confirm you have the real one: the Certificates & TLS page shows the Root CA’s SHA-256 fingerprint. Compare it against the PEM you are about to paste (or the PEM embedded in a share you received). If they differ, do not enable strict verification — get the CA through a trusted channel instead.
Common failures
SAN mismatch— you are connecting by a name or IP that is not in the certificate. Add it on the server (see the Domains & SAN Management page) and reissue;Certificate expired or not yet valid— the server’s clock is wrong, or the leaf failed to renew. Check the certificate status in the Web UI;Not signed by the configured CA— the CA in the field belongs to a different server, or the connection is being intercepted. Compare fingerprints before proceeding.